Use a template, customize it

If you have already pinpointed your need for an information management application or have an idea for an application software, then you know that Simitless is here to help you. (If identifying your precise need is still something you are struggling with, have a look at our previous articles, where we go in-depth on this precise topic.) If you are just unsure of how to actually start building your app, then rest assured, you are not the only one. In fact, the main problem I have observed with people just starting out with their project - people exactly like you - is that even if they know what they want, they are quite overwhelmed with the task of taking the first step. They simply do not know where to start.
Start simple
To be frank, the easiest way to start or at least to be inspired to start is to look at what exists. This is what I always recommend to the people I do consulting work for. And luckily, Simitless offers quite a few application models that you can examine, analyze, take apart, tweak, change, modify, heck, even vandalize if you feel like it! You can use any template as a base for your own application. If this is what you decide to do, the template is copied into your workspace and becomes your app. If the template fits your needs, you can start inputting data into it straight away. If you need to tweak it, do not hesitate to modify it to your heart’s content. If it turns out that the template is not the right fit at all, feel free to scrap it completely and start afresh from another template (or even from scratch).
Modify a model
Let’s consider the case when the template seems to fit your needs. Once your application has been created from the said template, go to the application menu (three small vertical dots in the top right corner), then click on the "Edit app" menu item.


You will see that there are several options that are available to you :

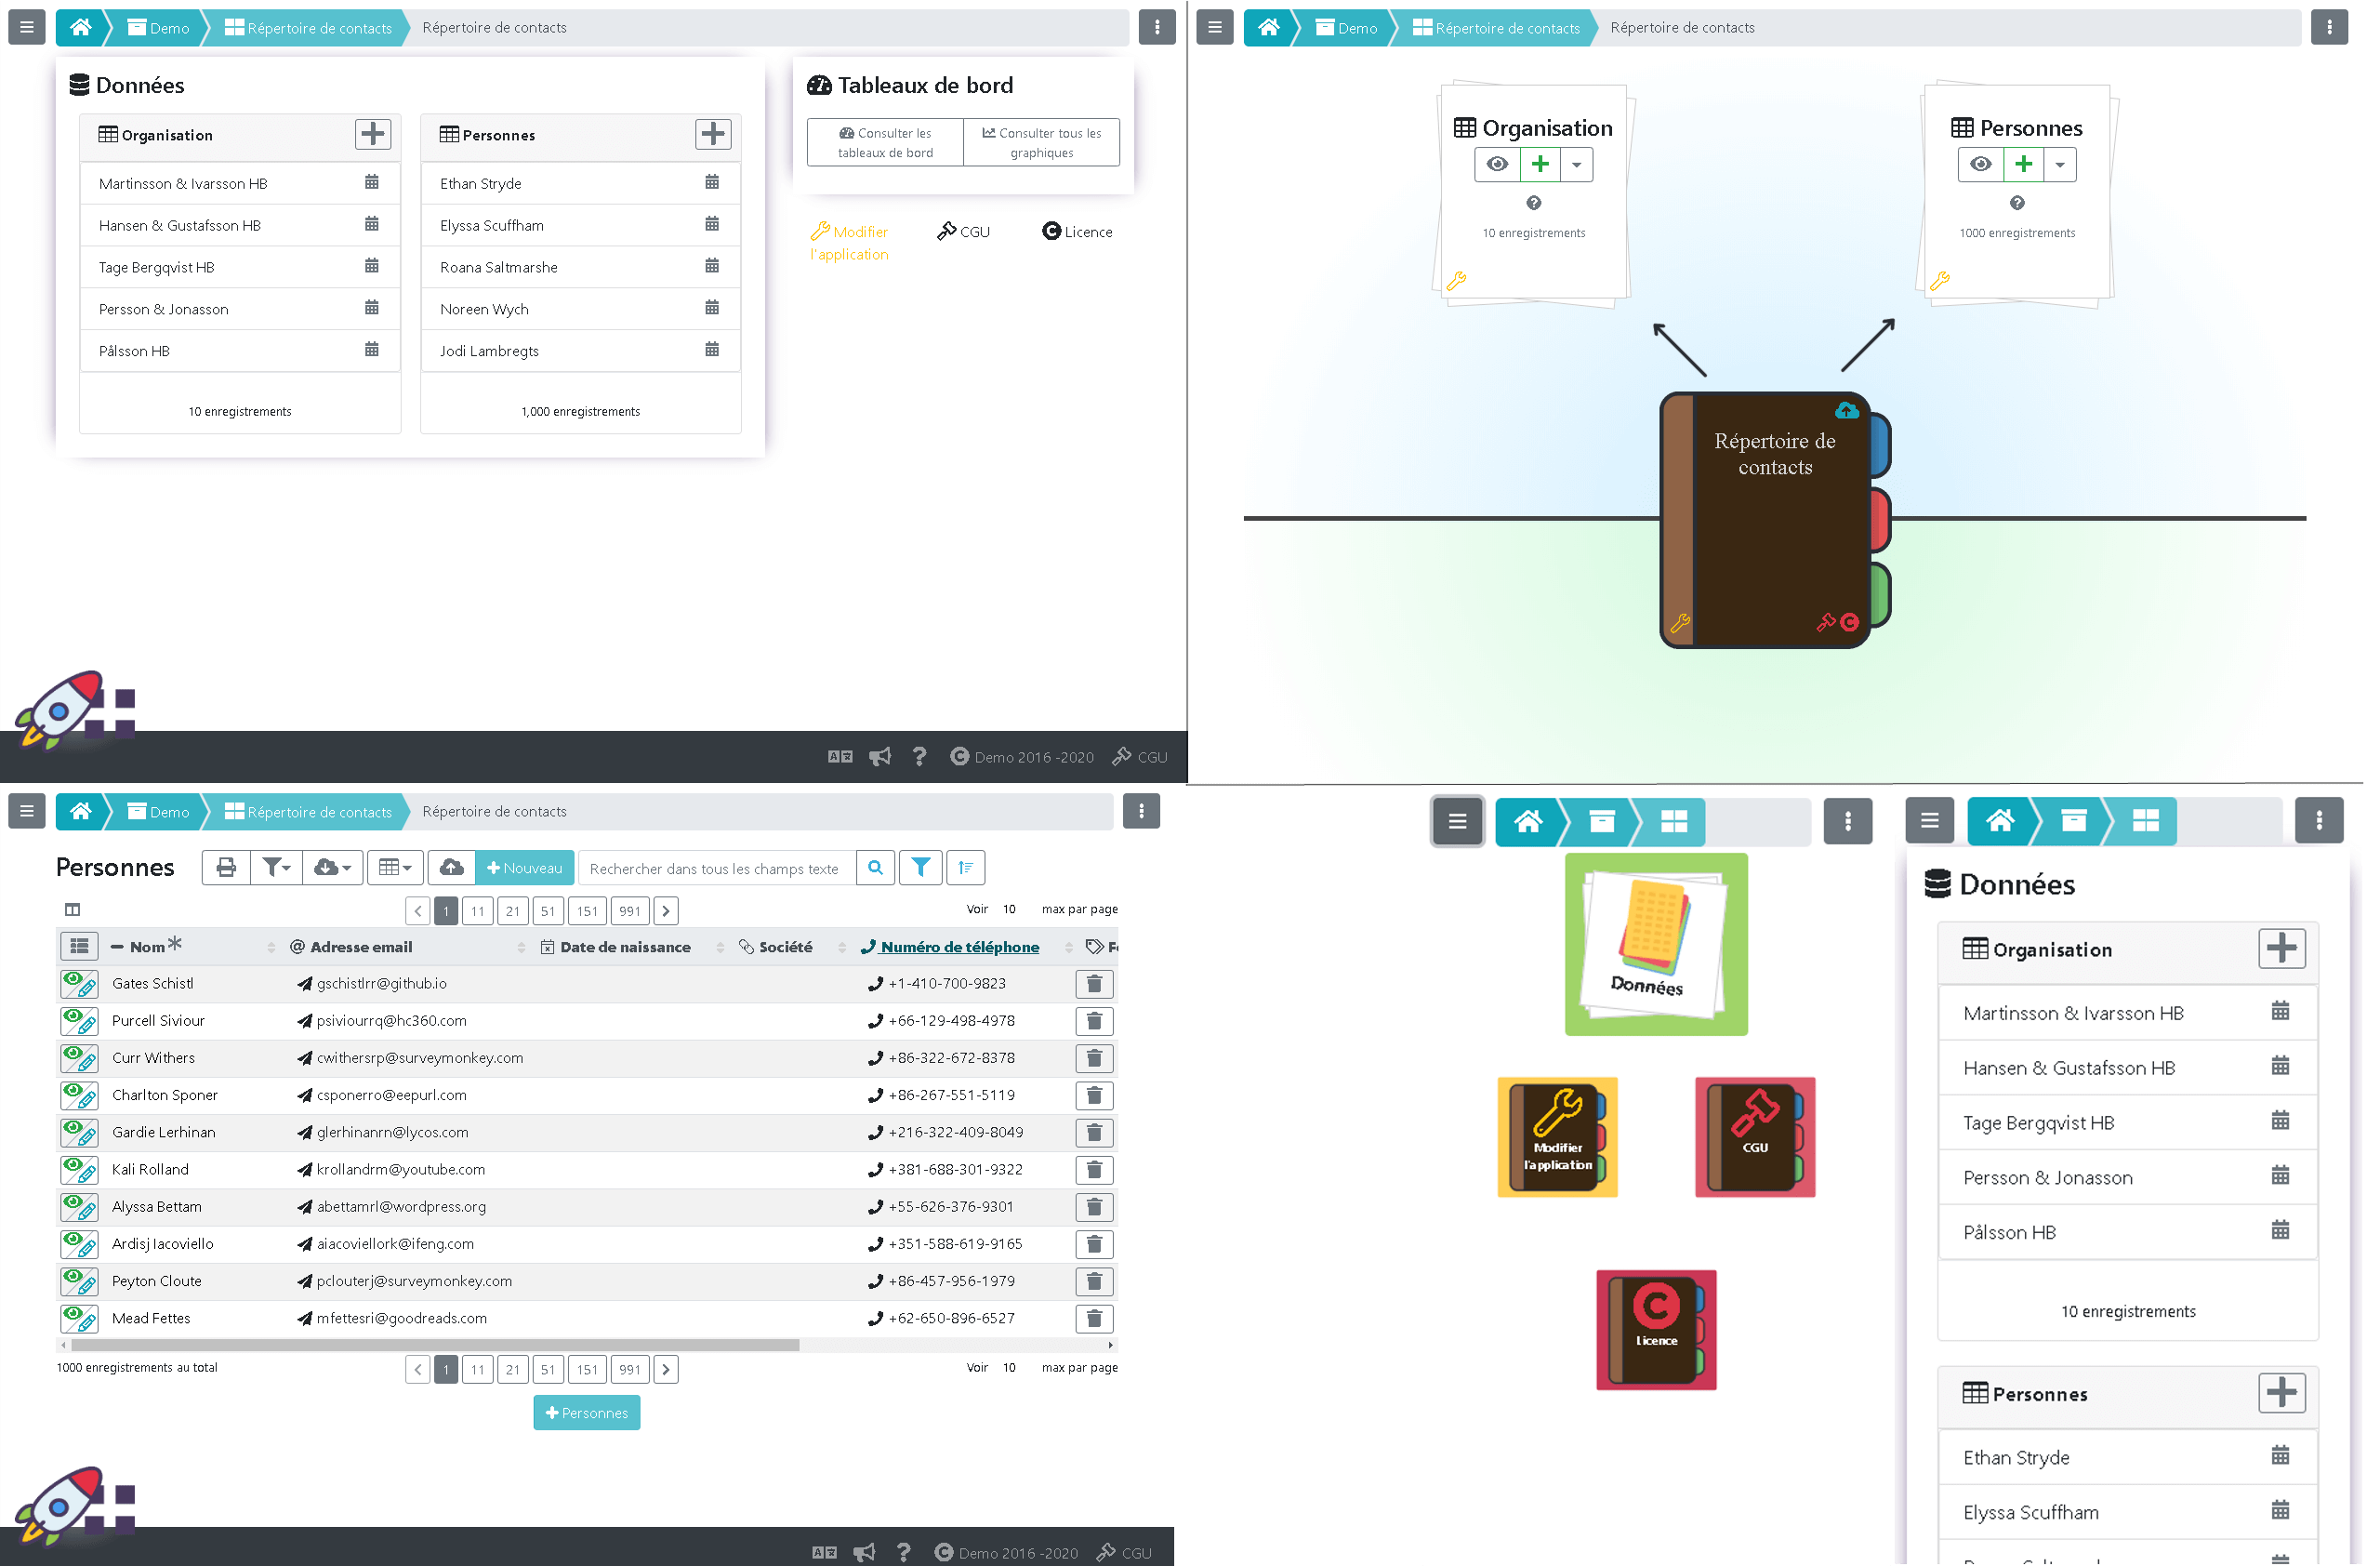
- The "Edit app" tab allows you to change the main view of your app. In other words, you can choose how the data is presented on the homepage of your application. You can choose between the default type that allows you to access your records more quickly, and the composite lists view that allows access to multiple parts of the application. Or you can opt for the mobile view (also known as tiled view) that offers a simplified interface and is more accessible for small screens. In this same tab, you can change several display options which we have talked about in the "Personalize your application" article.
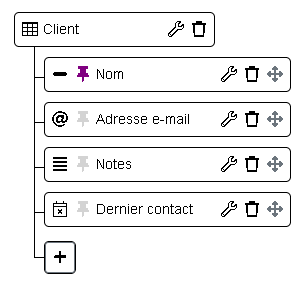
- The "Edit data types" tab shows you the internal structure of the data of your application. Modifying this data structure tree - via adding, changing, removing certain fields - allows you to modify the very functioning of your application.
-
Now to the data types. You can easily identify each data type within the structure tree by the square-like frame that surrounds it and changes color on hover. To get better acquainted with the settings each data type has (by the way, depending on the type, settings may vary), let’s have a look at the data type settings page. You can access the page by simply clicking the "Wrench" icon located to the right of the name of your data type. Now, once on you have accessed the page, you see fields like:
- "Type Name" and "Description" – these are the sections that you can fill out in order to provide your users with information regarding the purpose of the field;
- "Default table display page size" – this field enables you to adjust the number of records in the record lists (tables, index cards, indexes, galleries, playlists) you want to display;
- "Show info columns in table" – in this section you can select whether you want additional information like creation date, modification date, author name to be displayed on your data type settings page;
- "Printing templates" – in this section you can define a custom document layout for all your printing needs;
- "Enable Barcode Direct Access" – activate or deactivate this setting depending on whether you want to enable a quick access to the data type via a laser scanner or a mobile application;
- "Unit" – interesting primarily for numeric values, providing a unit of measure (be it litres, meters, degrees, etc.) that will appear alongside the numeric value avoids introducing errors into your information system when inputting information;
- "Default Value" – use this field to input a default value so that whenever the data is created, the value entered here will be input by default (for example, in a date field, the default value could be "today", the default value for a number field could be "10" as this is the most often input value);
- "Data Constraints" – when your data information management application software calls for it, add certain constraints (be it numerical like numbers between 5 and 12, or textual like 12-letter text, etc.) to ensure data quality;
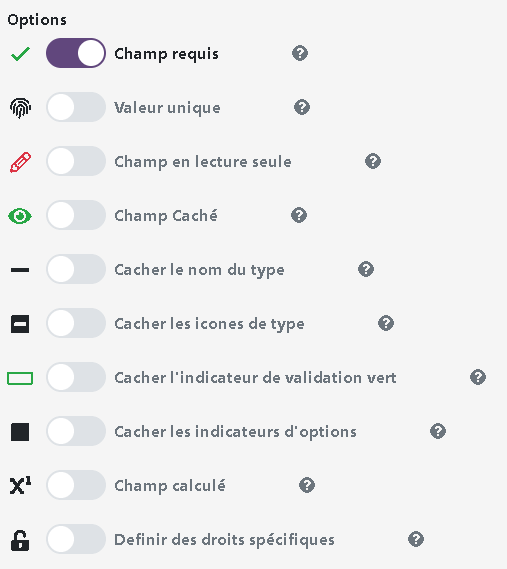
- "Mark as required" – activate or deactivate this setting depending on whether you want the value in this field to be absolutely necessary
- "Unique values" – activate or deactivate this setting depending on whether you want to avoid that the same value is repeated in other records. Thus, an error message will appear if another record already contains this value;
- "Read-only field" – activate or deactivate this setting depending on whether you want to make this field editable;
- "Hidden field" – activate or deactivate this setting depending on whether you want to make this field invisible;
- A set of other display settings like "Hide field name", "Hide data type icon", "Hide the green validation glow" enable you to tweak the visual aspects of your data type, depending on whether you choose to activate or deactivate them. Play around, see what pleases your eye;
- "Calculated field" – activate this setting if you want to set up a formula to calculate the value of this field based on parent, child or linked records.
Little by little.
These settings serve the main purpose of enabling you to create an application that corresponds to your exact needs without having to start from scratch every time. At the same time, Simitless gives you the flexibility your business needs. All applications can be modified at any time and following the needs of your business can be easily adapted to respond to your new requirements.
Be it as it may, the goal remains the same. To spend as little time creating your application as possible. And in my opinion, due to the platform’s flexibility, quick implementation and affordable prices Simitless is the best alternative that can fulfill this goal, offering an ideal solution for setting up innovative systems while reducing risks.